I received some requests asking how I made the smoke flower after I shared it on various sites so I decided to make a tutorial showing how. If you would like to know how to photograph smoke please visit my earlier blog post:
http://dewadding.blogspot.ca/2012/10/process-smoke-photo-tutorial.html
This tutorial will start at the point were the photo has already been taken and processed using photoshop. This is the image that we will be working with. It has been rotated and cropped. If you wish to download this image and try this for yourself it's available for free download at:
http://shogunmaki.deviantart.com/art/Smoke-Stock-for-flower-tutorial-343594806
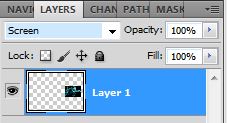
After loading the image into photoshop click on File/New and create a new photoshop image the same size as the smoke image. Now on the new image click Layer/New/Layer and click ok. This will create a new layer called Layer 1. Select Layer 1 and click on Layer/Smart Objects/Convert to Smart Object. This will make Layer 1 a smart object. Double click on the Layer 1 thumbnail. This will open up Layer 1. If you have never done this before a pop-up window will tell you about saving. Just click ok. Switch to the smoke image and select the rectangular marquee tool. Use the marquee tool to select all of the smoke image. Click Edit/Copy then switch to Layer 1.psb. Click Edit/Paste and the smoke will be pasted into this layer. Press Ctrl-T, this will put you in free transform mode and reduce the size by 30%.

Adjust the W: and the H: to 30%. Then press the check mark. Select the move tool and move the image over to the right size of the work space. Now change the blending mode of the layer to screen.
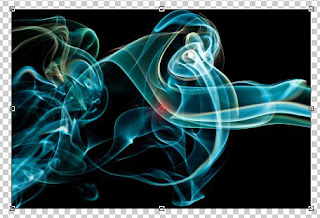
With the blending mode on screen any part of the layer that is black now becomes transparent. However, one thing to keep in mind is that anything that is light in the image will become lighter so you may have to darken areas later on. Also if you are attempting to do this with an image that you want the black to show it will not work using screen. At this point we are going to start creating duplicate layers that are in different positions. To do this press Ctrl-Alt-T. This is similar to what we used earlier to make the smoke smaller but by adding Ctrl we are making another layer. When the transform box comes up you will notice a little x in the middle of it (highlighted in the next image with a red circle). Move that x to the far left in the center where you see an adjusting square. That x is what determines the rotation point of the layer. Change the angle in the transform box to 45 degrees then click the check mark. Your new layer should rotate 45 degrees down. After that you can now press Shift-Ctrl-Alt-T and that will repeat that layer. Press Shift-Ctrl-Alt-T 6 times to complete a full circle. After doing this you can close Layer 1.psb. Photoshop will ask if you want to save this layer. Say yes. Go to your new document and you will see your flower on a white background. Use the paint bucket to fill the background layer black, Click Layer/Flatten Image, Crop off any excess and you are done.
I hope you enjoyed this tutorial and if you have any questions feel free to ask. I do not use a Mac so I am not familiar with any of the keyboard shortcuts.


I found that using the blending mode of lighten works better than screen and it prevents the light spots from getting brighter.
ReplyDelete